
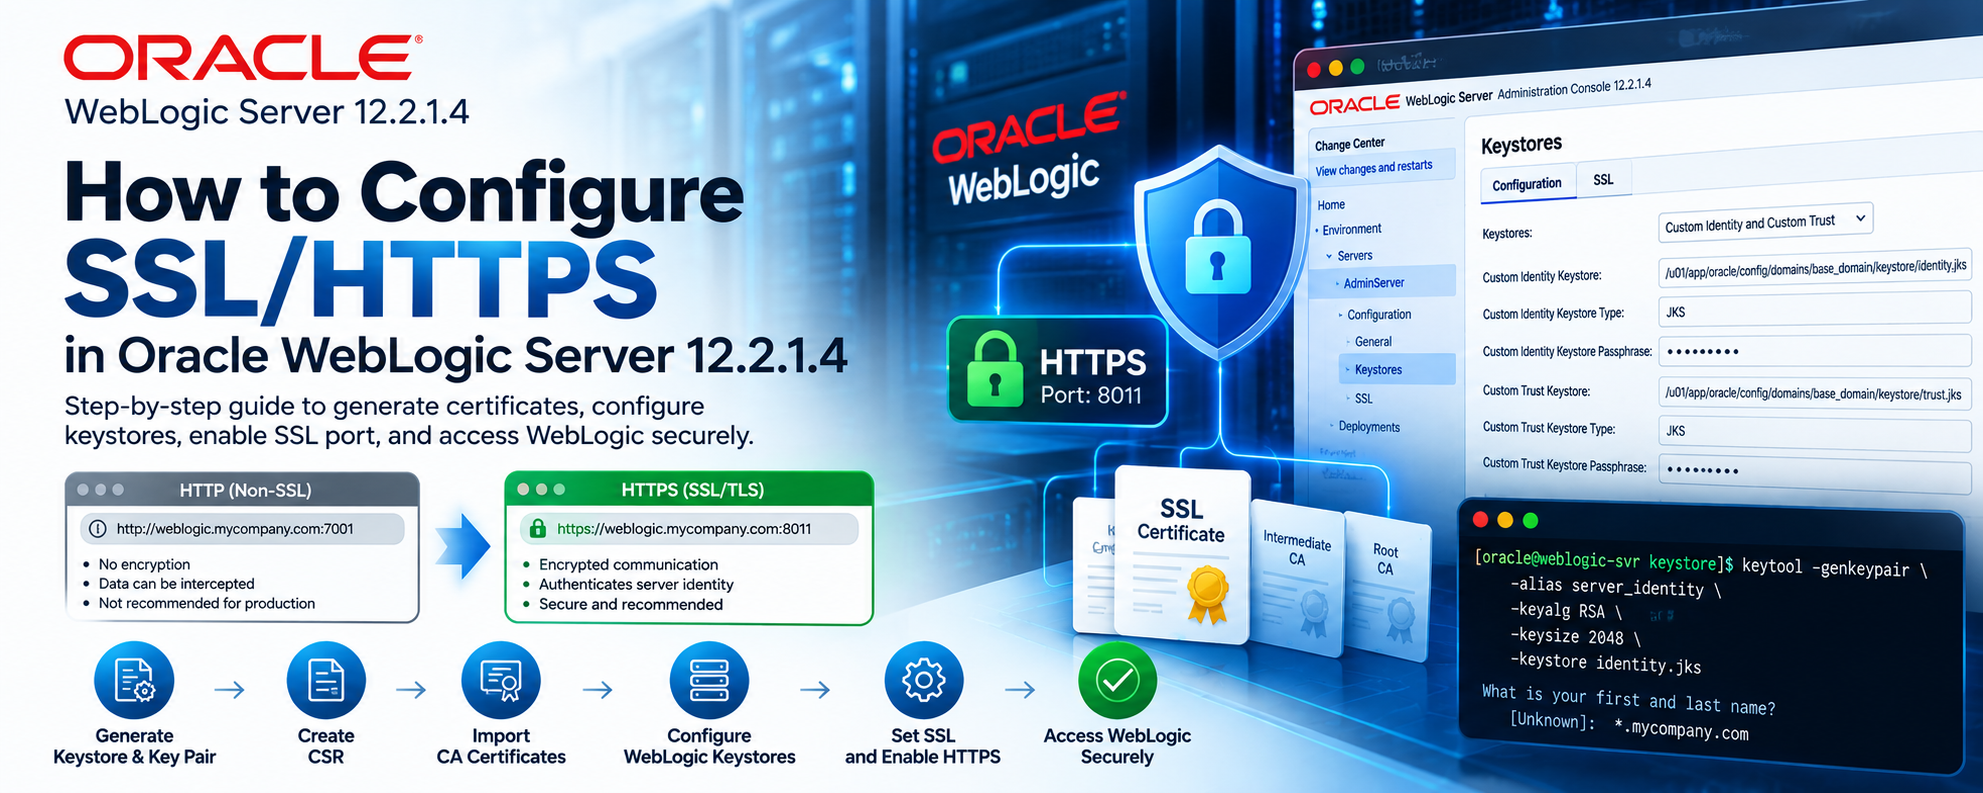
How to Configure SSL/HTTPS in Oracle WebLogic Server 12.2.1.4
Introduction
Oracle WebLogic Server is widely used as an enterprise Java application server for hosting business critical applications.
By default, WebLogic Server can communicate over HTTP, which does not encrypt information transmitted between the client and the server.
For production environments, securing this communication is important, especially when applications transmit authentication credentials, session information, or sensitive business data.
Oracle WebLogic Server supports SSL/TLS encryption, allowing clients to establish secure HTTPS connections.
In this article, we will configure SSL for an Oracle WebLogic Server 12.2.1.4 environment using a Certificate Authority (CA) signed certificate and a Java KeyStore (JKS).
We will cover certificate generation, CSR creation, certificate installation, WebLogic configuration, and HTTPS connectivity verification.
1. Understanding SSL and Non-SSL Connections
Before configuring SSL, it is important to understand the difference between encrypted and unencrypted communication.
Non-SSL communication (HTTP)
HTTP transmits application data without transport-layer encryption.
For example:
http://weblogic.example.com:7001/console
When HTTP is used, information transmitted between the client and WebLogic Server is not protected by TLS encryption.
This may expose sensitive information to interception on untrusted networks.
SSL/TLS communication (HTTPS)
HTTPS uses Transport Layer Security (TLS) to encrypt communication between the client and server.
For example:
https://weblogic.example.com:8011/console
TLS provides three important security properties:
- Encryption: Protects data transmitted between the client and server.
- Authentication: Allows the client to verify the server's identity using a trusted certificate.
- Integrity: Helps detect unauthorized modification of transmitted data.
Although the term SSL is commonly used in WebLogic configuration interfaces, modern HTTPS connections use TLS rather than the obsolete SSL protocols.
HTTP vs. HTTPS
| Feature | HTTP (Non-SSL) | HTTPS (SSL/TLS) |
|---|---|---|
| Encryption | No | Yes |
| Server certificate | Not required | Required |
| Data confidentiality | Not protected by TLS | Protected by TLS |
| Default conventional port | 80 | 443 |
| WebLogic port | Configurable | Configurable |
| Recommended for sensitive applications | No | Yes |
WebLogic commonly uses port 7001 for HTTP and 7002 for HTTPS in example environments, but the actual ports depend on the domain configuration.
For this demonstration, we will use HTTPS port 8011.
2. Environment Details
The following environment is used in this demonstration.
| Parameter | Configuration |
|---|---|
| WebLogic Version | 12.2.1.4 |
| Operating System | Oracle Linux |
| WebLogic Domain | base_domain |
| Keystore Directory | /u01/app/oracle/config/domains/base_domain/keystore |
| Keystore Format | JKS |
| Certificate Type | CA-signed wildcard certificate |
| Common Name (CN) | *.mycompany.com |
| Organization | My Company PLC |
| Organizational Unit | IT |
| Locality | Colombo 03 |
| State | Western |
| Country | LK |
| HTTPS Port | 8011 |
The company name and domain used here are examples. Replace them with your organization's certificate information.
Prerequisites
Before starting, ensure that:
- Oracle WebLogic Server 12.2.1.4 is installed and running.
- You have access to the WebLogic Administration Console.
- You have operating system access to the WebLogic domain directory.
- The Java
keytoolutility is available. - You can obtain a certificate from a trusted Certificate Authority.
- The required HTTPS port is permitted through relevant firewalls.
Important: Schedule a maintenance window because the SSL configuration may require restarting the WebLogic server.
3. Step 1: Create the Keystore Directory
Log in to the WebLogic server using the operating system account that owns the WebLogic installation.
In this demonstration, we use the oracle account.
Navigate to the WebLogic domain directory.
cd /u01/app/oracle/config/domains/base_domain
Create a directory for storing the SSL certificates and keystores.
mkdir -p keystore
Navigate to the directory.
cd keystore
Verify the location.
pwd
Expected output:
/u01/app/oracle/config/domains/base_domain/keystore
Restrict access to this directory because it will contain the server's private key.
For example:
chmod 700 /u01/app/oracle/config/domains/base_domain/keystore
4. Step 2: Generate the Identity Keystore and Private Key
The first step in configuring SSL is generating a private key and an identity keystore.
A Java KeyStore is a file used to store cryptographic keys and certificates.
For WebLogic SSL configuration, the identity keystore contains the server's private key and its corresponding certificate chain.
Generate the key pair
Execute the following command:
keytool -genkeypair \
  -alias server_identity \
  -keyalg RSA \
  -keysize 2048 \
  -sigalg SHA256withRSA \
  -validity 365 \
  -keystore identity.jks \
  -storetype JKS
The command prompts for a keystore password and certificate identity information.
Enter the following details:
What is your first and last name?
  *.mycompany.com

What is the name of your organizational unit?
  IT

What is the name of your organization?
  My Company PLC

What is the name of your City or Locality?
  Colombo 03

What is the name of your State or Province?
  Western

What is the two-letter country code?
  LK
Confirm the information.
CN=*.mycompany.com,
OU=IT,
O=My Company PLC,
L=Colombo 03,
ST=Western,
C=LK
The command creates the file:
identity.jks
Verify the keystore
ls -l identity.jks
Inspect the keystore:
keytool -list -v \
  -keystore identity.jks \
  -storetype JKS
Verify that the alias server_identity exists and the entry type is PrivateKeyEntry.
Important security consideration
For production certificates, the Certificate Authority will generally require the requested DNS names to appear in the certificate's Subject Alternative Name (SAN) extension.
A Common Name alone should not be relied upon for modern TLS hostname verification.
Ensure that the certificate request includes the appropriate DNS SAN entries.
For a wildcard certificate, confirm that the wildcard covers the actual hostname used by clients.
For example, *.mycompany.com covers app.mycompany.com, but does not automatically cover mycompany.com or app.internal.mycompany.com.
5. Step 3: Generate the Certificate Signing Request (CSR)
After generating the identity keystore, the next step is to create a Certificate Signing Request.
A CSR contains the public key and identifying information that the Certificate Authority uses to issue the server certificate.
The private key remains in the identity keystore and must never be shared with the Certificate Authority.
Generate the CSR
Run:
keytool -certreq \
  -alias server_identity \
  -file certreq.pem \
  -keystore identity.jks \
  -storetype JKS \
  -ext "SAN=dns:*.mycompany.com"
Enter the keystore password when prompted.
The command creates:
certreq.pem
Verify the CSR
ls -l certreq.pem
You can inspect the request using OpenSSL:
openssl req -in certreq.pem -noout -text
Verify the requested subject and DNS names.
Submit the CSR to the Certificate Authority
Share the certreq.pem file with your Certificate Authority.
The CA will validate the request and issue the certificate.
Depending on the CA, you may receive:
- Server certificate
- Intermediate CA certificate
- Root CA certificate
For this demonstration, we assume the following filenames:
star_mycompany_com.pem
DigiCertCA2.pem
TrustedRoot.pem
These filenames are examples from the configuration draft. Use the actual files provided by your Certificate Authority.
6. Step 4: Import the SSL Certificates into the Identity Keystore
Once the signed certificates are available, copy them to the keystore directory.
cd /u01/app/oracle/config/domains/base_domain/keystore
The certificate chain must be installed correctly so WebLogic can present a valid server identity to clients.
Import the root CA certificate
keytool -importcert \
  -trustcacerts \
  -alias root \
  -file TrustedRoot.pem \
  -keystore identity.jks \
  -storetype JKS
Verify the certificate fingerprint against the trusted CA's published information before accepting it.
Import the intermediate CA certificate
keytool -importcert \
  -trustcacerts \
  -alias inter \
  -file DigiCertCA2.pem \
  -keystore identity.jks \
  -storetype JKS
If the CA supplies multiple intermediate certificates, import the required chain certificates using separate aliases.
Import the server certificate
keytool -importcert \
  -alias server_identity \
  -file star_mycompany_com.pem \
  -keystore identity.jks \
  -storetype JKS
Important: The server certificate must be imported using the same alias used when generating the private key.
In this example, the alias is:
server_identity
Using a different alias can prevent the signed certificate from being associated with the existing private key.
Verify the certificate chain
Run:
keytool -list -v \
  -alias server_identity \
  -keystore identity.jks \
  -storetype JKS
Verify:
- Entry type is
PrivateKeyEntry. - The certificate chain is present.
- The server certificate is valid.
- The certificate contains the expected DNS SAN.
- The certificate has not expired.
The certificate chain length depends on the issuing CA.
7. Step 5: Create a Custom Trust Keystore
WebLogic uses two different keystore concepts.
Identity keystore
The identity keystore contains the private key and certificate chain used by WebLogic to identify itself to clients.
In this example:
identity.jks
Trust keystore
The trust keystore contains trusted CA certificates used by WebLogic when validating certificates presented by remote TLS peers.
For this demonstration, we will create a separate trust keystore named:
trust.jks
Import the root CA certificate
keytool -importcert \
  -trustcacerts \
  -alias trusted_root \
  -file TrustedRoot.pem \
  -keystore trust.jks \
  -storetype JKS
Import the intermediate CA certificate
keytool -importcert \
  -trustcacerts \
  -alias trusted_intermediate \
  -file DigiCertCA2.pem \
  -keystore trust.jks \
  -storetype JKS
Verify the trust keystore
keytool -list \
  -keystore trust.jks \
  -storetype JKS
The trust keystore should contain the trusted CA certificates required for your environment.
Note: A custom trust keystore is not mandatory for every HTTPS deployment. WebLogic can also use an appropriate existing Java or WebLogic trust configuration. Choose the trust model based on your organization's certificate requirements, particularly for outbound TLS and mutual TLS.
8. Step 6: Configure SSL Keystores in the WebLogic Administration Console
After creating the keystores, configure WebLogic Server to use them.
Log in to the Administration Console
Open the WebLogic Administration Console using the currently configured management URL.
For example:
http://<weblogic-host>:7001/console
Log in with an authorized administrator account.
Navigate to the server configuration
Go to:
Environment → Servers → Select Server → Configuration → Keystores
If the WebLogic change center is enabled, click Lock & Edit before making changes.
Select the keystore configuration
Under Keystores, select:
Custom Identity and Custom Trust
Enter the following values:
| Parameter | Value |
|---|---|
| Custom Identity Keystore | /u01/app/oracle/config/domains/base_domain/keystore/identity.jks |
| Custom Identity Keystore Type | JKS |
| Custom Identity Keystore Passphrase | <Identity Keystore Password> |
| Confirm Identity Passphrase | <Identity Keystore Password> |
| Custom Trust Keystore | /u01/app/oracle/config/domains/base_domain/keystore/trust.jks |
| Custom Trust Keystore Type | JKS |
| Custom Trust Keystore Passphrase | <Trust Keystore Password> |
| Confirm Trust Passphrase | <Trust Keystore Password> |
Click Save.
Ensure that the WebLogic operating system account has permission to read both keystores.
9. Step 7: Configure the SSL Private Key
Next, configure WebLogic to use the private key stored in the identity keystore.
Navigate to:
Environment → Servers → Select Server → Configuration → SSL
Configure the following parameters:
| Parameter | Value |
|---|---|
| Private Key Alias | server_identity |
| Private Key Passphrase | <Private Key Password> |
| Confirm Private Key Passphrase | <Private Key Password> |
The private key alias must match the alias created in Step 2.
For this demonstration:
server_identity
Click Save.
Why is the private key alias important?
The identity keystore can contain multiple entries.
WebLogic uses the configured private key alias to identify which certificate and private key should be presented during the TLS handshake.
If the alias is incorrect or the private key password does not match, the SSL listener may fail to initialize.
10. Step 8: Enable the SSL Listen Port
Once the keystore and private key configuration is complete, enable the SSL listen port.
Navigate to:
Environment → Servers → Select Server → Configuration → General
Locate the SSL listen port settings.
Enable:
SSL Listen Port Enabled
Configure the port:
8011
Click Save.
Example configuration
| Parameter | Value |
|---|---|
| HTTP Listen Port | 7001 |
| SSL Listen Port Enabled | Yes |
| SSL Listen Port | 8011 |
The HTTP and HTTPS listeners can operate simultaneously.
However, enabling HTTPS does not automatically disable HTTP or redirect HTTP requests to HTTPS.
If the environment requires HTTPS-only access, review the non-SSL listener, application redirects, reverse proxy configuration, and management access requirements separately.
Activate changes
If applicable, click:
Activate Changes
Restart the affected WebLogic Server when required for the keystore and SSL listener configuration to take effect.
For a domain with multiple Managed Servers, repeat the required configuration on each server that terminates HTTPS.
11. Step 9: Verify HTTPS Connectivity
After restarting WebLogic, verify that the SSL listener is functioning.
Access the WebLogic Administration Console
Open a browser and type the URL with https and correct SSL port.
https://weblogic.mycompany.com:8011/console
Using a hostname that is not covered by the certificate may result in a browser certificate warning.
Verify the listening port
On the WebLogic server, run:
ss -lntp | grep 8011
Confirm that WebLogic is listening on the expected HTTPS port.
Test the TLS connection using OpenSSL
From a client with OpenSSL installed:
openssl s_client \
  -connect weblogic.mycompany.com:8011 \
  -servername weblogic.mycompany.com \
  -showcerts
Review the presented certificate chain.
Ensure the certificate is issued for the expected hostname and signed by the intended CA.
Test using curl
curl -vI https://weblogic.mycompany.com:8011/console
A successful TLS connection confirms that the HTTPS listener is responding.
An HTTP redirect or authentication response may be normal for the Administration Console.
Avoid using curl -k as a substitute for proper certificate verification.
12. Troubleshooting Common SSL Configuration Issues
Issue 1: SSL listener does not start
Possible causes include:
- Incorrect keystore path
- Incorrect keystore password
- Incorrect private key alias
- Incorrect private key password
- Unsupported or incompatible keystore format
- Port already in use
Review the WebLogic server logs for keystore and SSL initialization errors.
Issue 2: Browser displays a certificate warning
Possible causes include:
- Certificate hostname mismatch
- Missing intermediate certificate
- Untrusted Certificate Authority
- Expired certificate
- Incorrect DNS configuration
Verify the certificate's Subject Alternative Name entries and complete certificate chain.
Issue 3: HTTPS port is unreachable
Check whether WebLogic is listening on the configured SSL port.
ss -lntp | grep 8011
Verify operating system firewall rules and any cloud network security rules.
If the server runs in OCI, review the applicable Network Security Groups or Security Lists.
Issue 4: Incorrect private key alias
Verify the keystore entries:
keytool -list -v \
  -keystore identity.jks \
  -storetype JKS
Confirm that the alias configured in WebLogic matches the PrivateKeyEntry alias.
Issue 5: Certificate chain is incomplete
Verify that the identity keystore contains the signed server certificate and required issuing certificates.
keytool -list -v \
  -alias server_identity \
  -keystore identity.jks \
  -storetype JKS
Import any missing intermediate certificates and revalidate the chain.
Issue 6: TLS protocol or cipher mismatch
Older Java runtimes and WebLogic patch levels may have different TLS protocol and cipher support.
Ensure that the WebLogic installation and Java runtime are appropriately patched.
Use supported modern TLS protocols and avoid enabling obsolete SSL or TLS versions solely to accommodate outdated clients.
13. Security Best Practices
For production WebLogic environments, consider the following recommendations.
Use CA-signed certificates
Use certificates issued by a trusted internal or public Certificate Authority.
Avoid relying on WebLogic demonstration certificates for production workloads.
Protect private keys
Restrict access to the identity keystore.
Never share private keys or keystore passwords through unsecured communication channels.
Use modern TLS configurations
Disable obsolete protocols and weak cipher suites where supported by your WebLogic and Java patch levels.
Keep WebLogic and Java updated
Apply the relevant Oracle Critical Patch Updates and supported Java security updates.
Restrict administrative access
Limit access to the WebLogic Administration Console to authorized administrators and trusted networks.
Monitor certificate expiration
Maintain a process to track certificate expiration and renew certificates before they expire.
Consider SSL termination architecture
In some environments, SSL is terminated at a load balancer or reverse proxy rather than directly on WebLogic.
When end-to-end encryption is required, configure TLS on the connection between the proxy and WebLogic as well.
14. Conclusion
Configuring SSL/TLS in Oracle WebLogic Server 12.2.1.4 is an important step toward securing communication between applications, administrators, and WebLogic services.
The configuration involves generating an identity keystore, creating a Certificate Signing Request, obtaining a CA-signed certificate, importing the certificate chain, configuring WebLogic keystores, and enabling the SSL listen port.
Once configured, clients can access WebLogic over HTTPS using the appropriate hostname and port.
For production environments, it is equally important to maintain current security patches, protect private keys, validate certificates, and monitor certificate expiration.
By following these steps, administrators can implement certificate-based HTTPS connectivity for Oracle WebLogic Server 12.2.1.4.
References
- Oracle WebLogic Server 12.2.1.4 Documentation
- Oracle WebLogic Server Security Documentation
- Java Keytool Documentation
Disclaimer: The commands and configuration values are provided for educational purposes. Certificate names, paths, passwords, hostnames, ports, and security settings should be adapted and validated for the target environment before production deployment.
About the author
- Cloud Evangelist passionate about Oracle Cloud Infrastructure (OCI), Oracle Database, and cloud technologies. Through this blog, I share technical knowledge, hands-on experiences, troubleshooting tips, and best practices from real-world implementations.