
OCI Compute for Beginners: Launch Your First Linux Instance
Introduction
Oracle Cloud Infrastructure (OCI) Compute lets you create virtual machines and bare metal servers for applications, development, and infrastructure workloads. This tutorial walks through provisioning a Linux virtual machine using the OCI Console, from selecting a region and operating system to connecting through SSH.
This guide follows a sample deployment in the Singapore region, using Oracle Linux 9, a virtual machine, an existing VCN and public subnet, and SSH key authentication.
Before you begin
You need an OCI account with permission to create compute instances in the selected compartment, an existing VCN and subnet, and an SSH key pair. If you plan to connect from the internet, the subnet must support public IP assignment, have an appropriate route through an Internet Gateway, and permit SSH access through its network security rules. Check quotas, service limits, and costs before provisioning.
Example configuration
| Setting | Selection in this walkthrough |
|---|---|
| OCI region | Singapore |
| Instance type | Virtual machine (VM) |
| Operating system | Oracle Linux 9 |
| Shape family | AMD (example) |
| Shape illustrated | VM.Standard.E5.Flex |
| CPU and memory | 1 OCPU, 12 GB RAM |
| Network | Existing VCN and public subnet |
| Private IP | Automatically assigned |
| Public IP | Automatically assigned |
| Authentication | SSH key pair |
| Initial login user | opc |
Step 1: Open the Compute Instances page
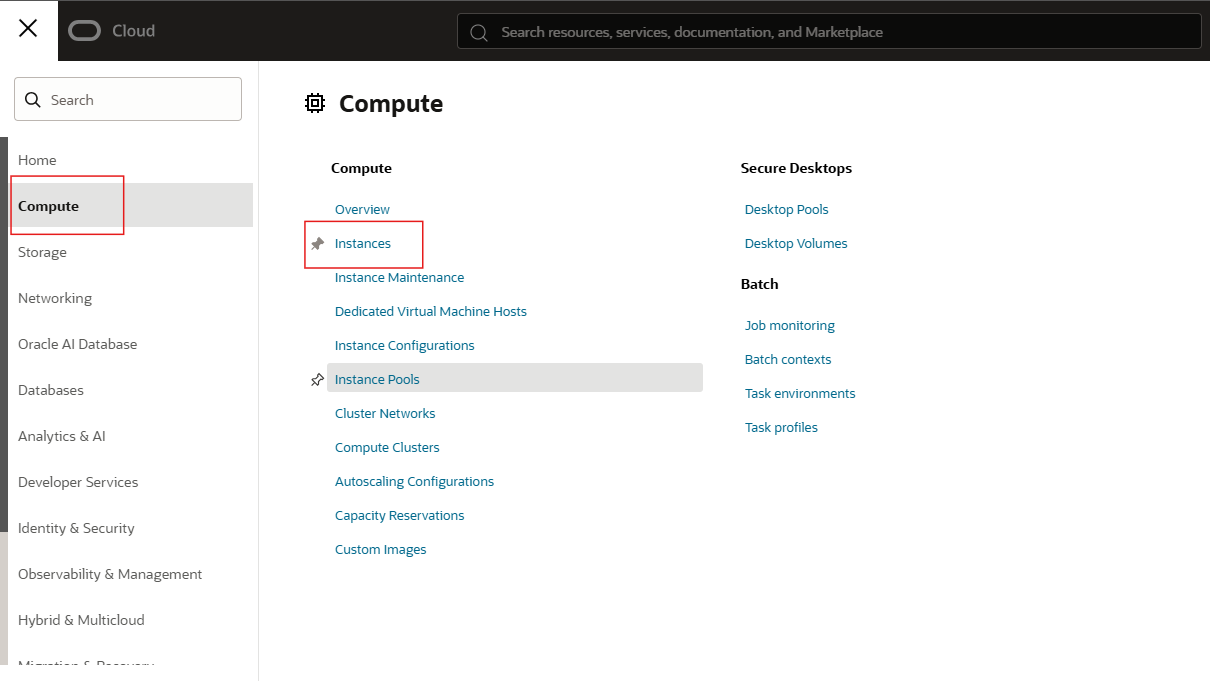
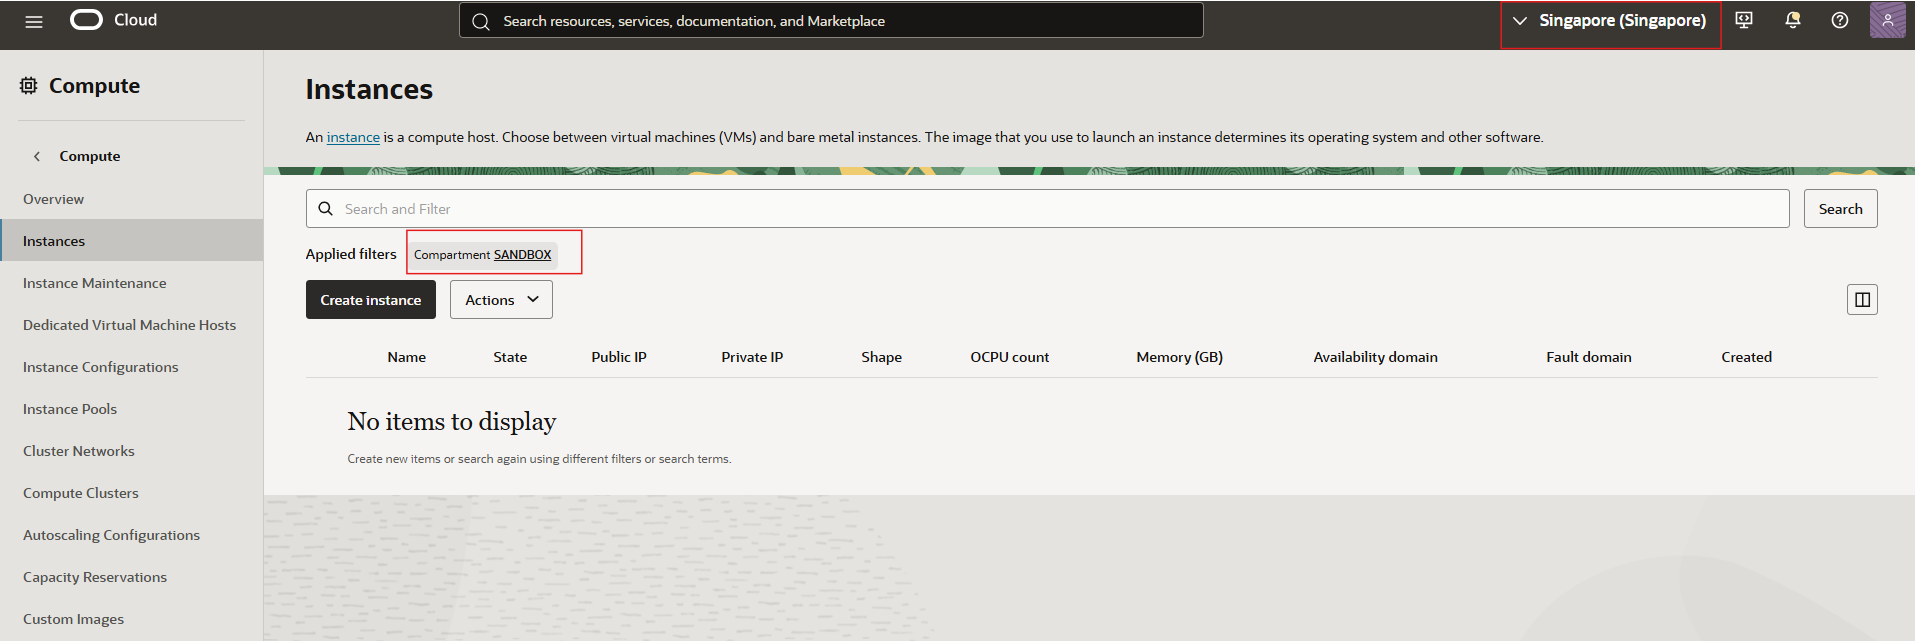
Sign in to the OCI Console and navigate to Compute → Instances. Confirm the intended region and compartment, because both determine where your new instance will be created. Click Create Instance to open the launch wizard.
Step 2: Name the instance and select its placement
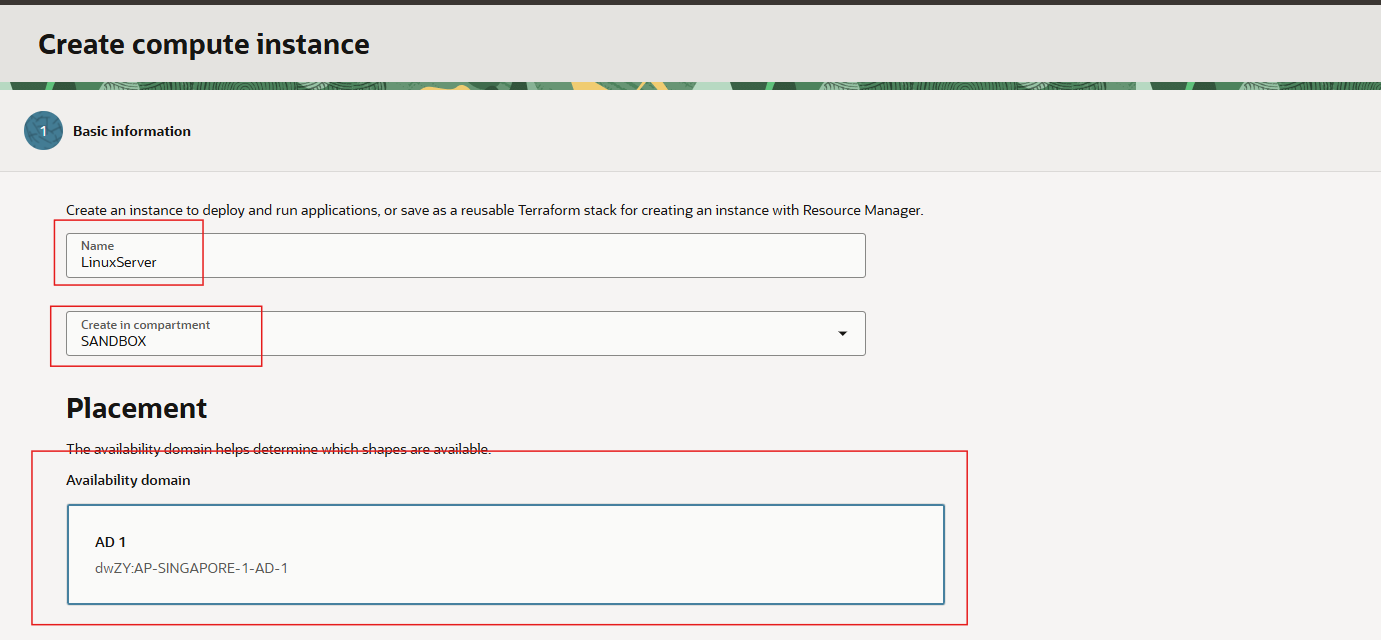
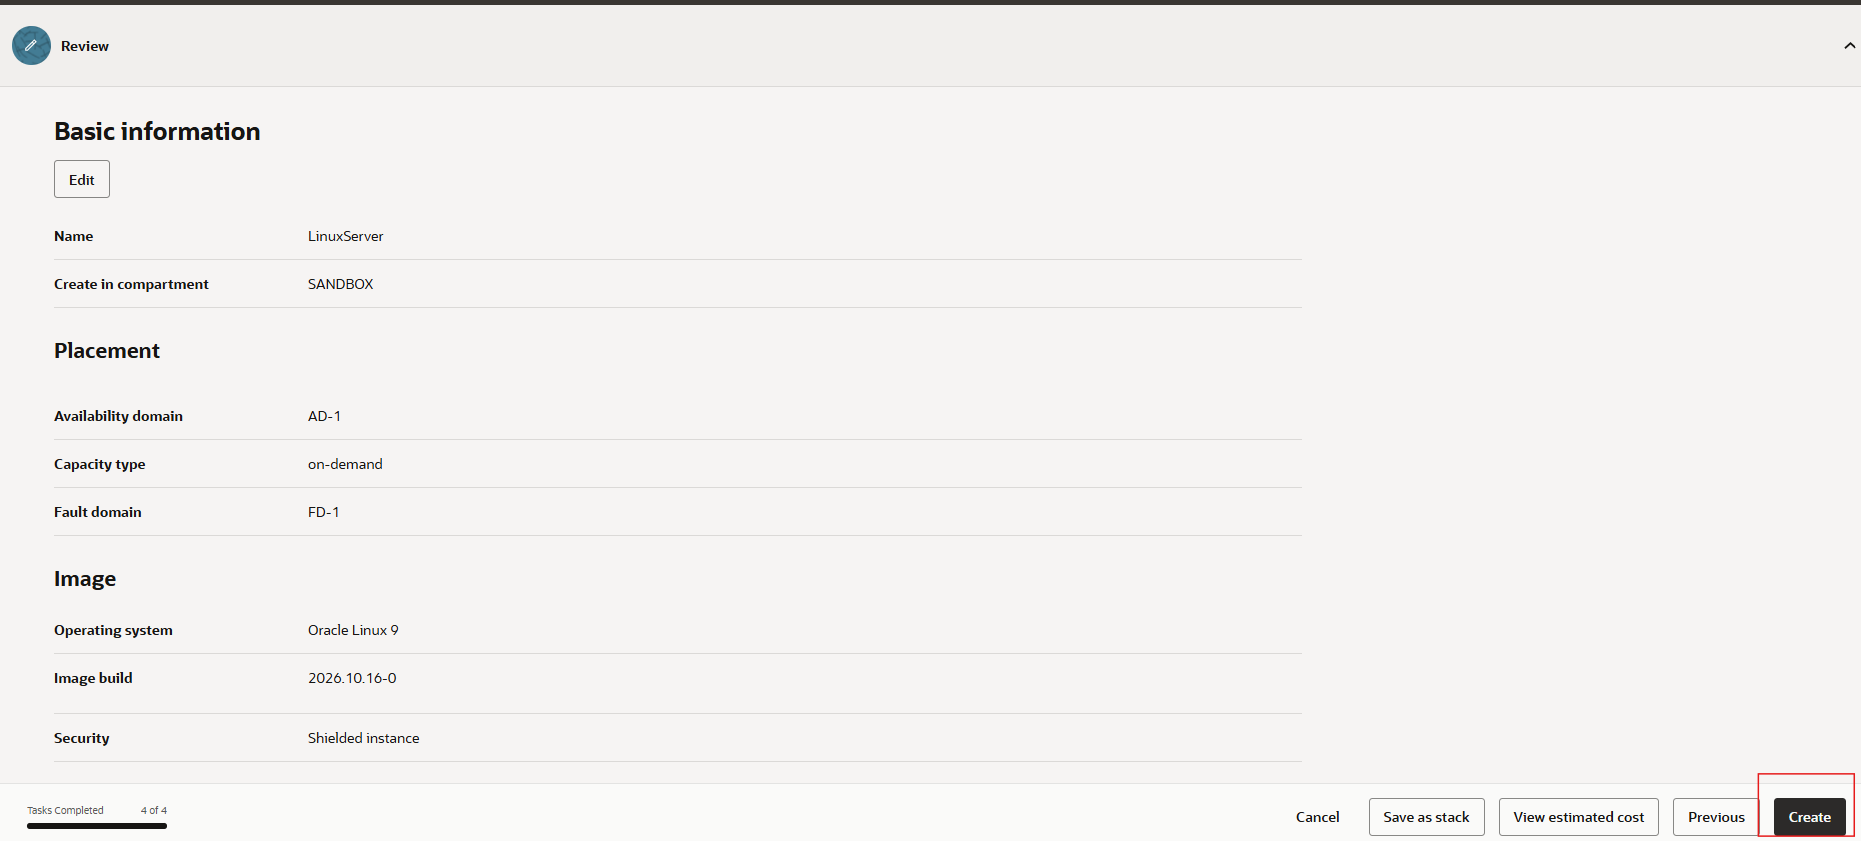
Enter a meaningful instance name, and verify the compartment. Select an Availability Domain (AD) if the region presents that option. In this example Singapore region onlhy has one AD and it is selected.
Under advanced placement settings, you can choose On-demand capacity and optionally specify a Fault Domain. The example selects Fault Domain 1. If you leave fault domain selection automatic, OCI places the instance in an available fault domain.
Step 3: Choose Oracle Linux 9
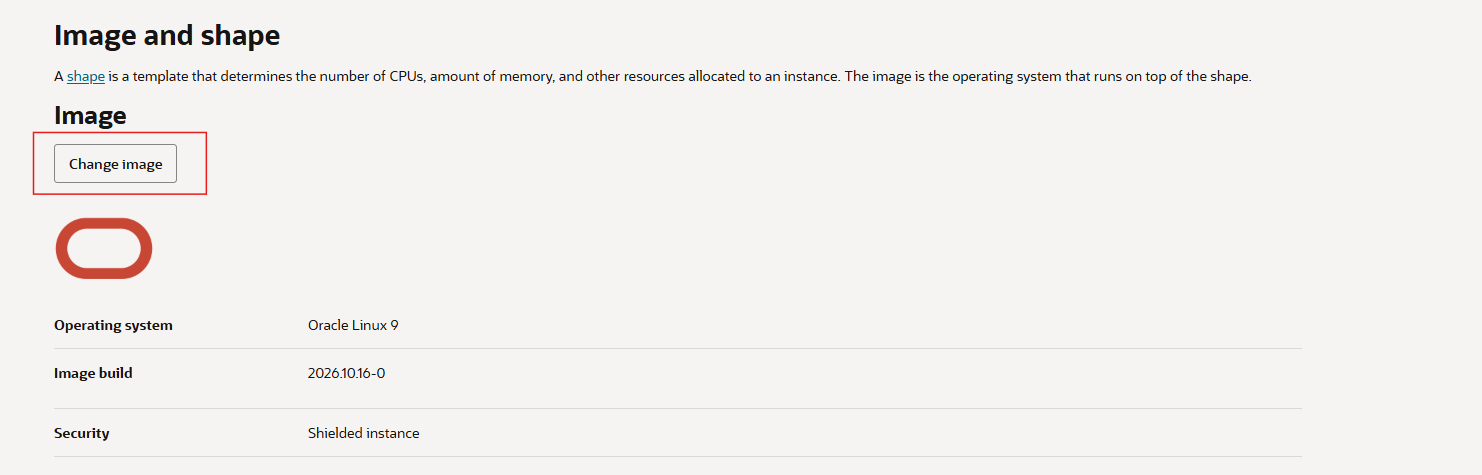
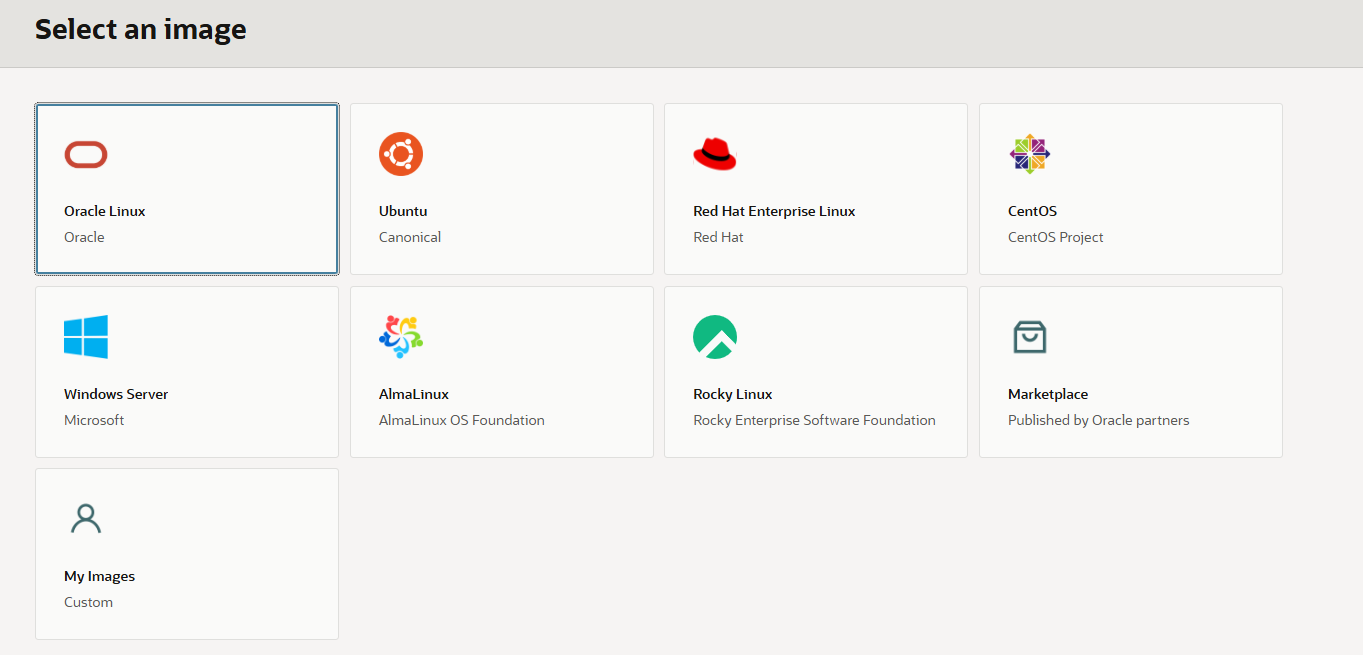
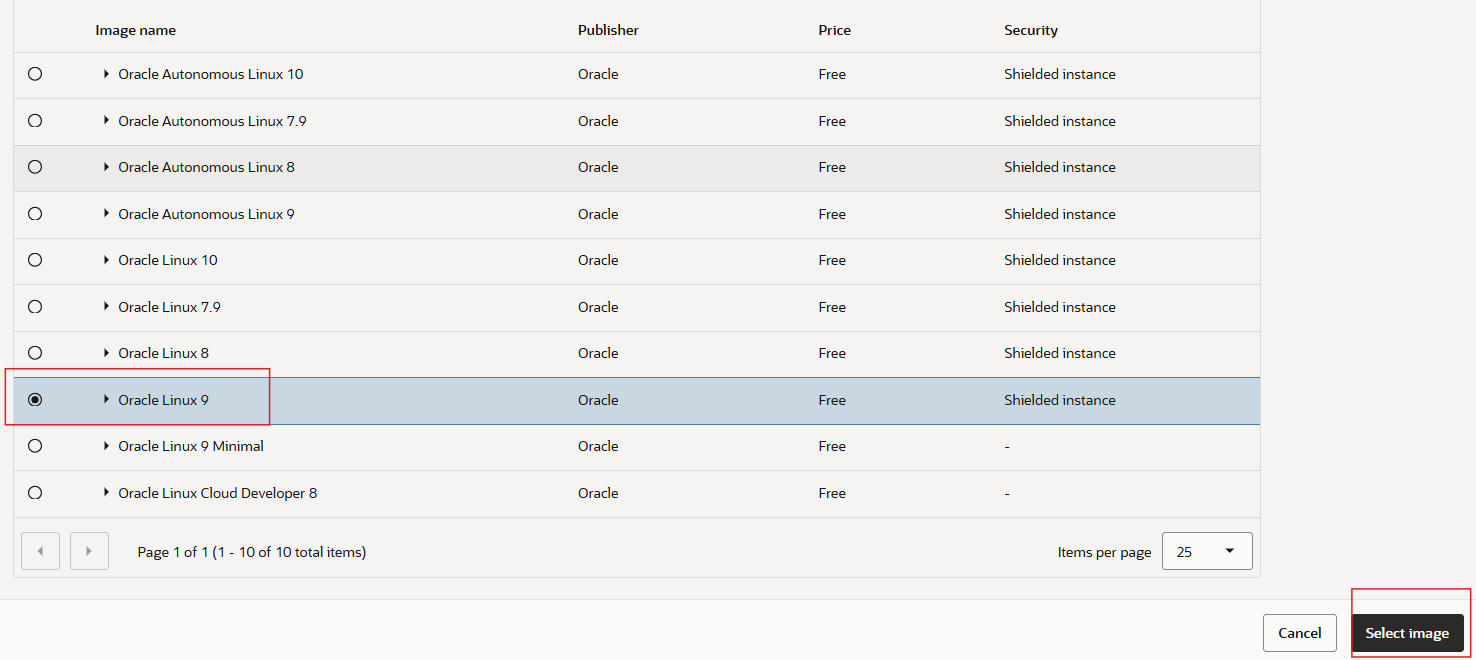
In Image and shape, click Change Image. Select Oracle Linux, browse the available versions, select Oracle Linux 9, and confirm with Select Image. The operating system image determines the initial boot volume contents and available features.
Step 4: Select the compute shape and resources
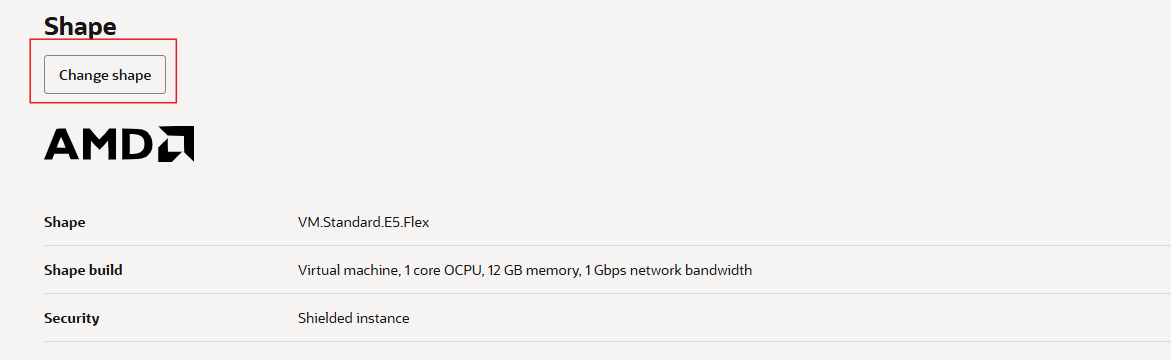
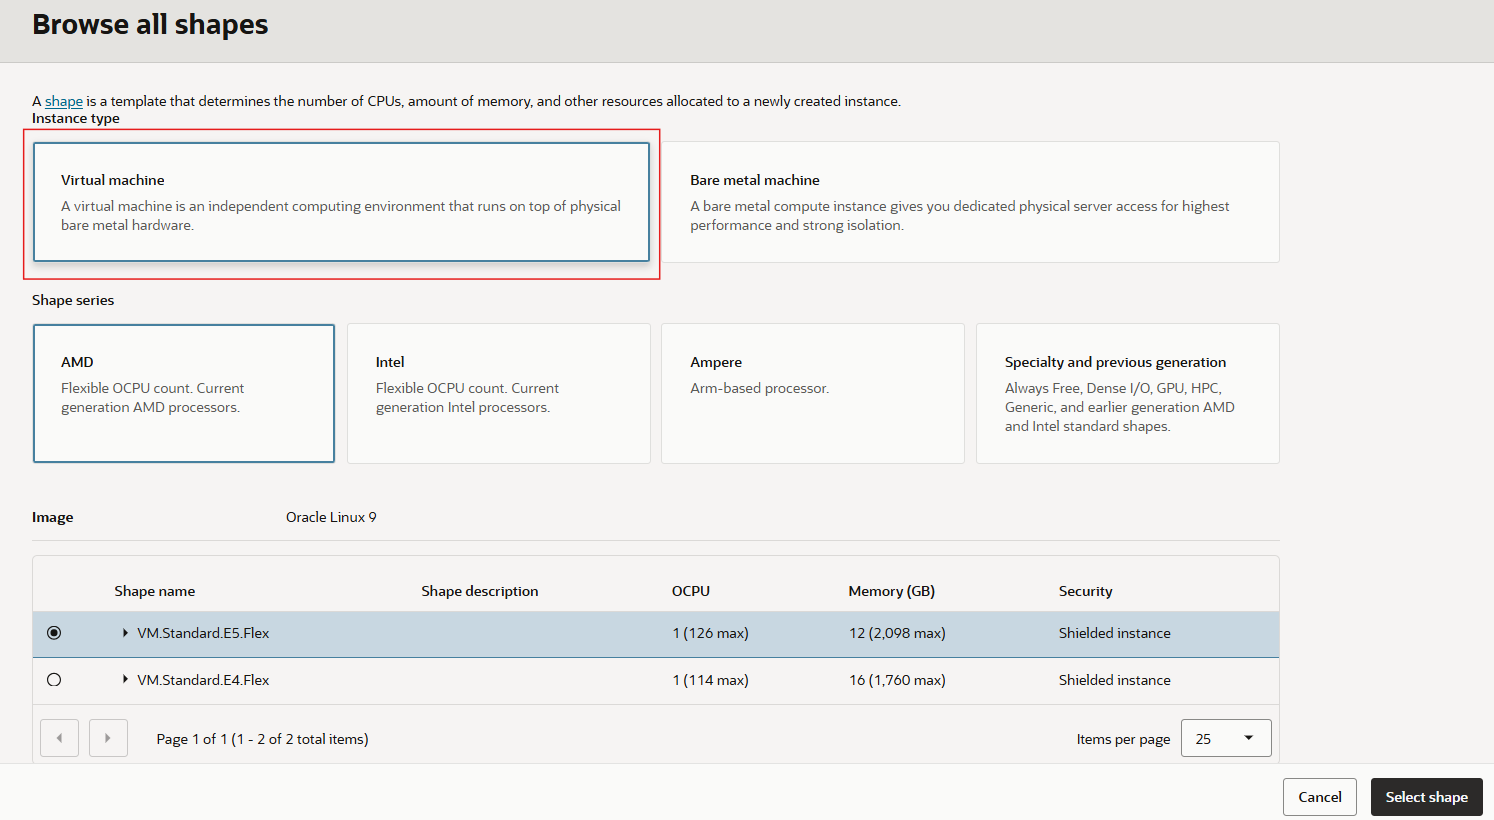
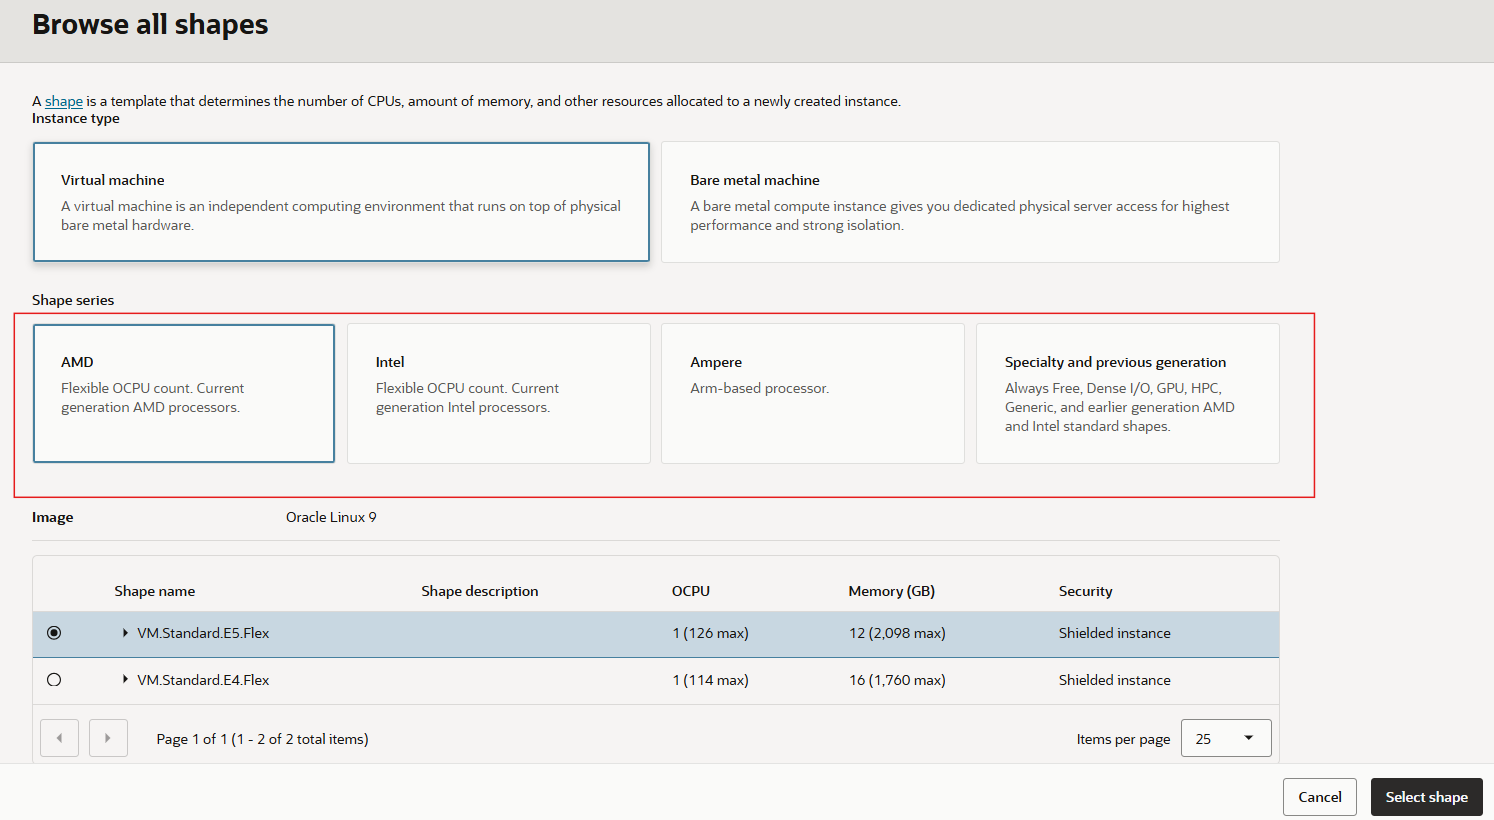
Click Change Shape. OCI offers Virtual Machine and Bare Metal Machine instance types, this tutorial uses a virtual machine. Browse the shape families, including AMD, Intel, Ampere, and specialty or previous-generation options.
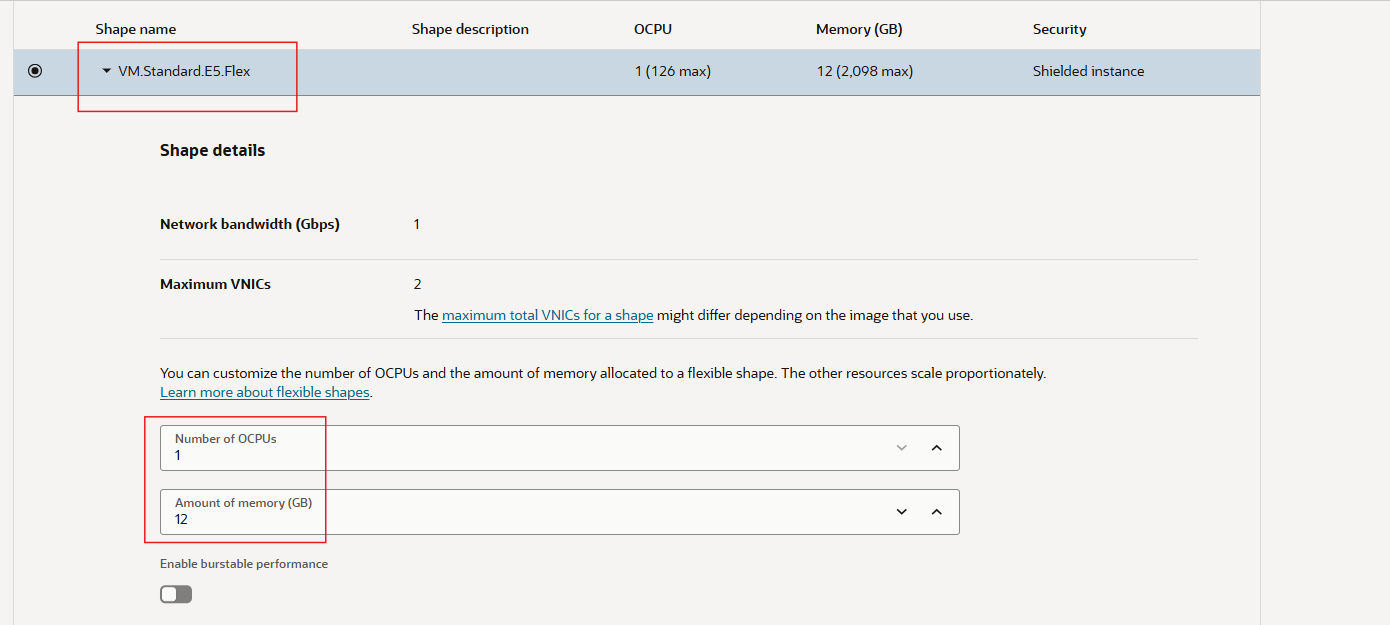
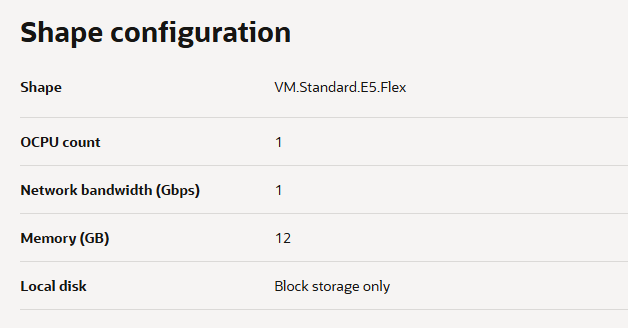
For a flexible VM shape, expand the shape details and select the desired OCPU count and memory. Below screenshots illustrate an AMD VM.Standard.E5.Flex shape configured with 1 OCPU and 12 GB RAM. Choose values that suit your workload and budget. Shape availability and limits can vary.
Step 5: Review the security options
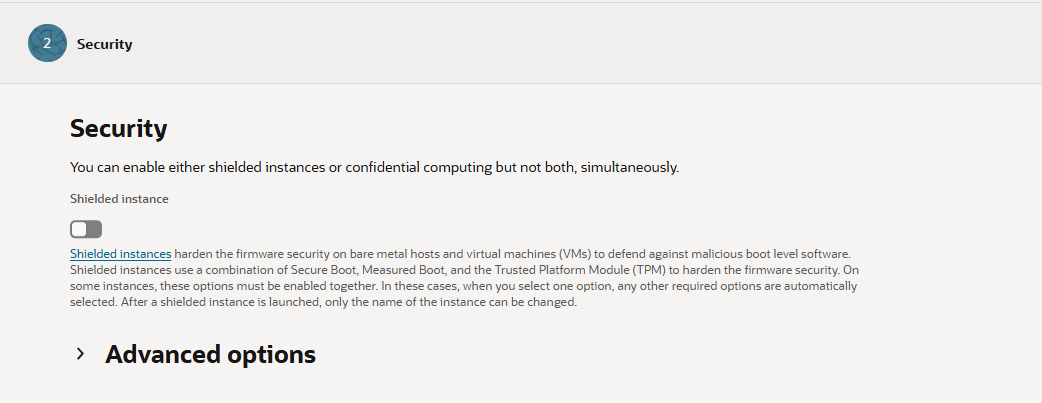
Proceed to the Security section. I will leaves the Shielded Instance option disabled and continues with the default selection. For a real deployment, assess whether Shielded Instances or other supported security options are appropriate before proceeding. These options may impose compatibility or operational constraints.
Step 6: Configure the primary VNIC and network
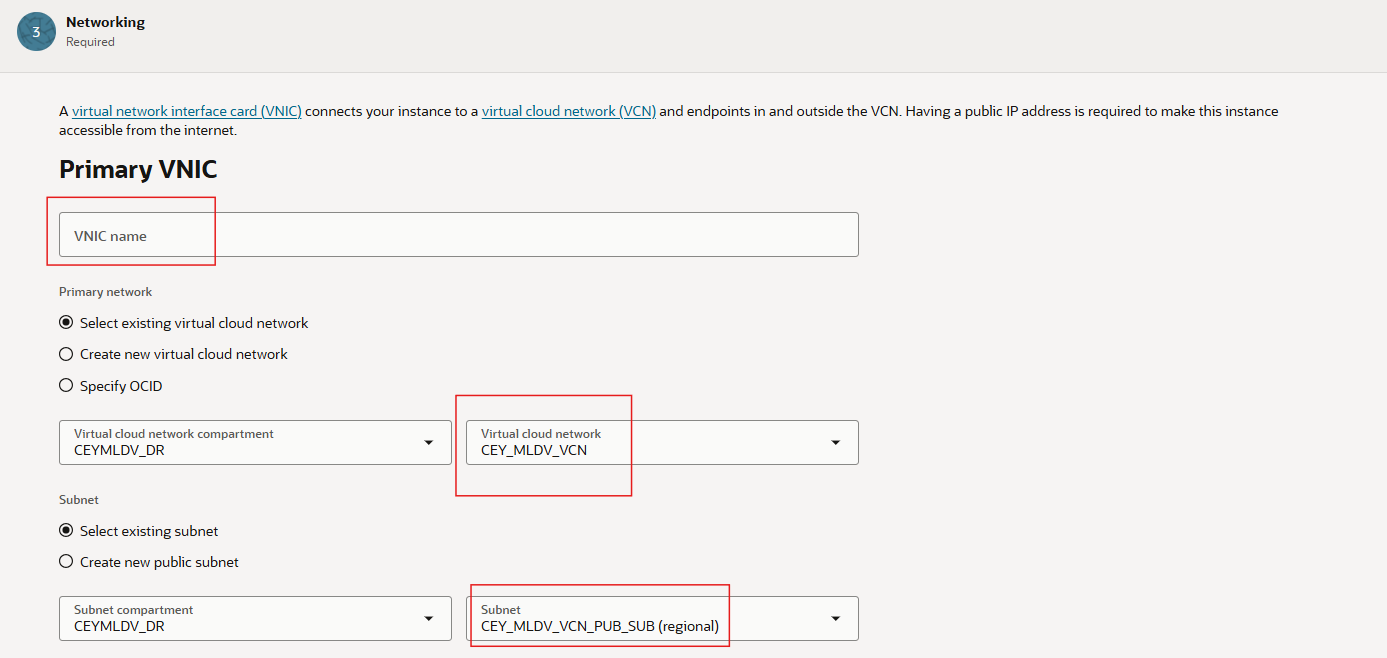
In the Networking section, optionally name the primary virtual network interface card (VNIC). Choose Select existing virtual cloud network, then select the correct VCN and subnet from the available lists.
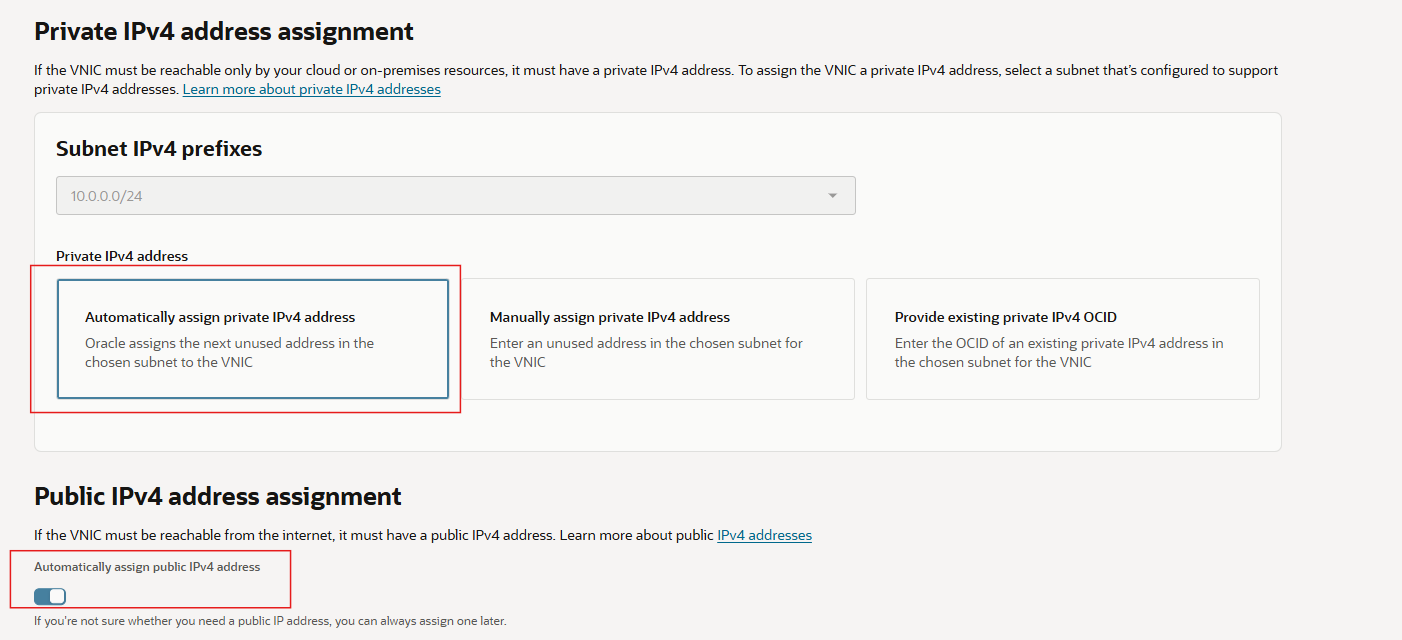
This example uses an existing public subnet. For the private IPv4 address, choose Automatically assign private IPv4 address. OCI selects an available address from the subnet. You can instead manually request a specific available private address when required.
Enable Automatically assign public IPv4 address for the internet accessible example. A public IP alone does not guarantee access: the VCN route table, Internet Gateway, security rules, and server firewall must also allow the intended traffic. A private subnet is generally preferred for workloads that do not require direct internet access.
Step 7: Configure SSH key authentication
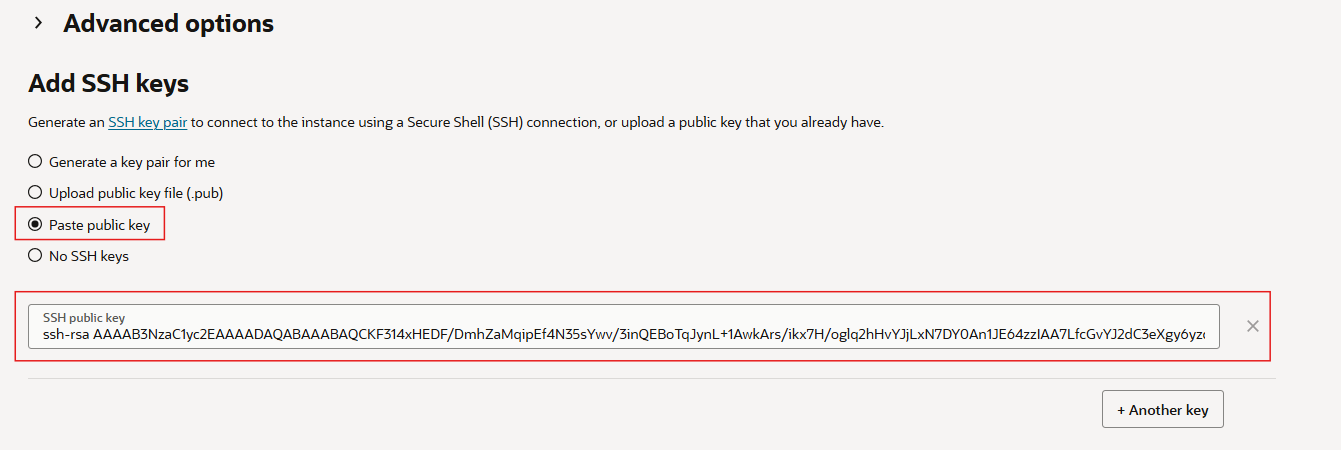
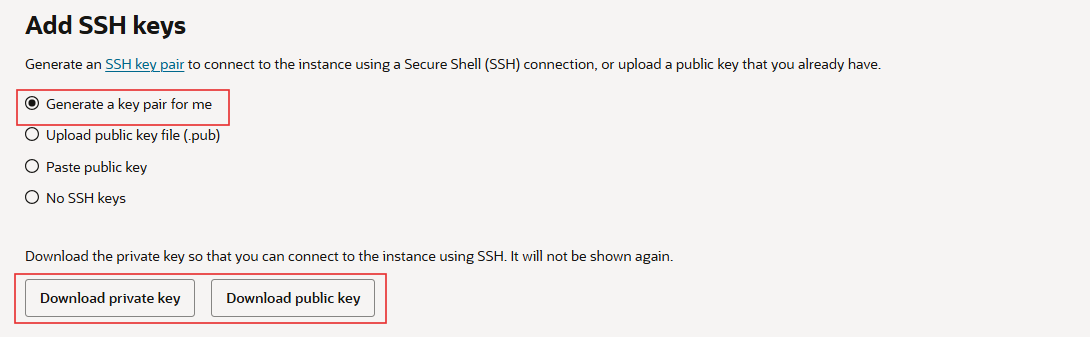
OCI uses SSH public-key authentication for Linux instance access. In Add SSH keys, either upload or paste your SSH public key, or choose Generate a key pair for me.
In this example I will use a key pair created with PuTTYgen and pastes the public key into the launch wizard.
If OCI generates a new key pair, download the private key and store it securely before continuing. OCI may not let you retrieve that private key later. Never publish or share private keys in a blog or screenshot.
Step 8: Configure the boot volume
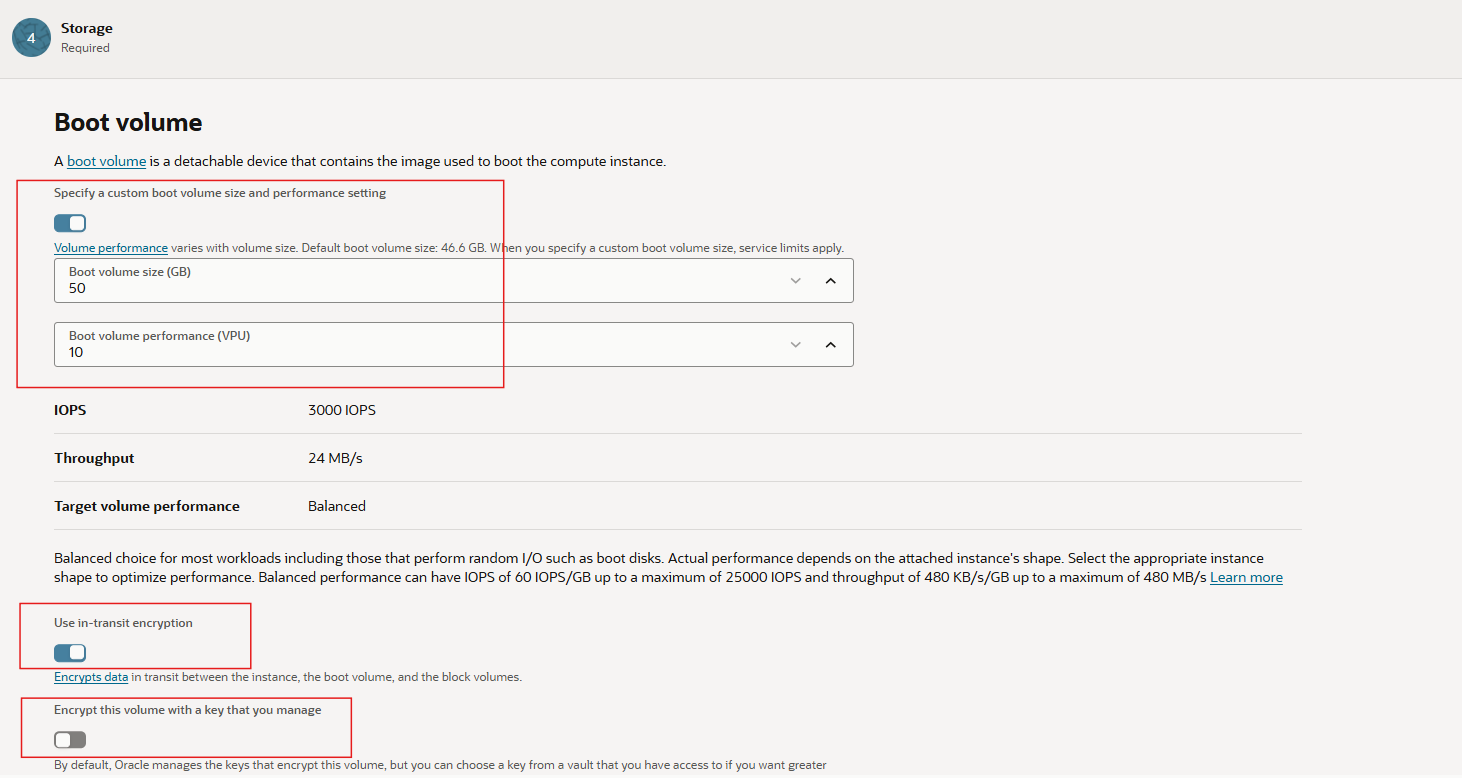
Continue to Storage. This example shows the option to specify a custom boot volume size and enable in-transit encryption. OCI boot volumes are encrypted at rest, depending on the service and configuration, you can use Oracle-managed or customer-managed encryption keys. Choose the boot volume capacity and security settings required for your workload.
Review the final configuration and click Create.
Step 9: Monitor provisioning and inspect the instance
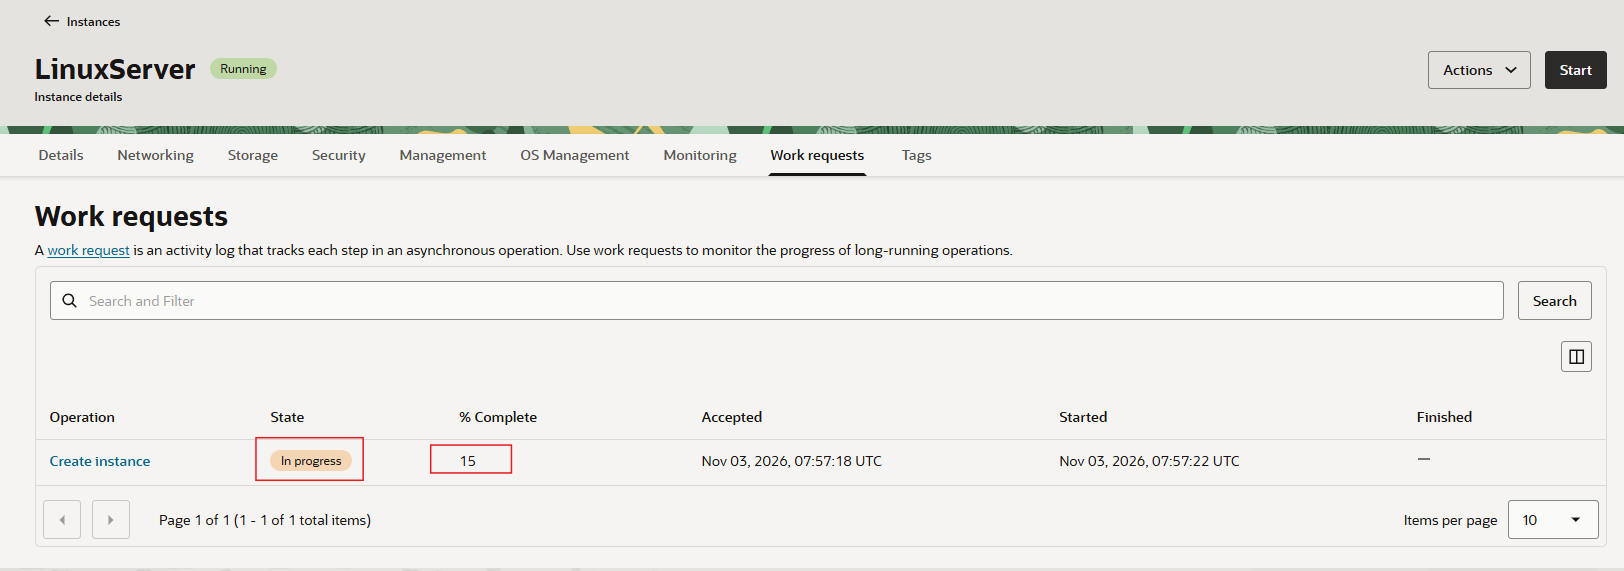
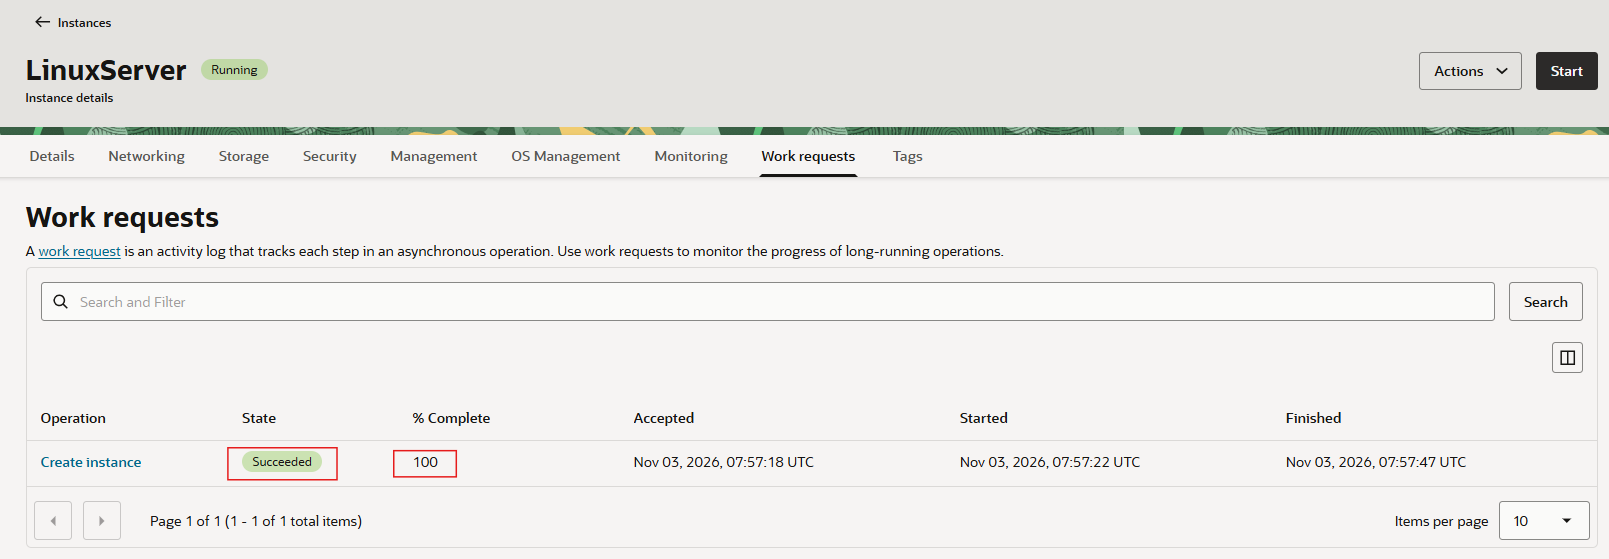
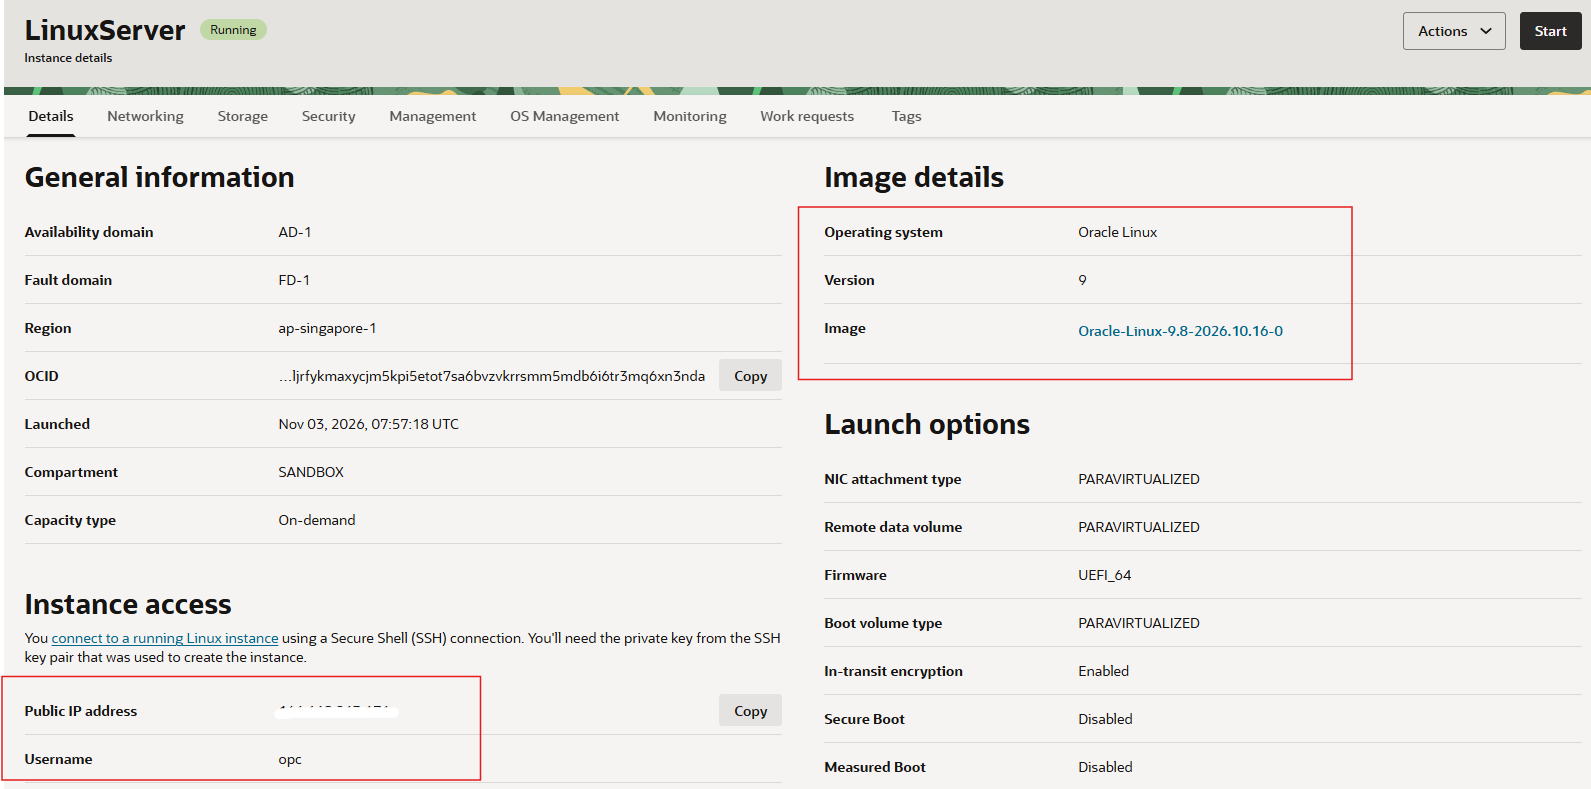
After submitting the wizard, OCI shows the provisioning progress in Work Requests. Wait until the request reports Succeeded and the instance reaches Running state.
Open the instance details to confirm the selected image, shape, OCPU and memory configuration, network addresses, and availability domain. Screenshot demonstrates the work request progressing to 100% and shows the resulting instance details.
Step 10: Connect to the Linux instance over SSH
For an Oracle Linux platform image, the default initial user is generally opc. Connect from an SSH client using the private key corresponding to the public key supplied during provisioning:
ssh -i /path/to/private_key opc@<INSTANCE_PUBLIC_IP>
On Linux or macOS, protect the private key file permissions if needed:
chmod 600 /path/to/private_key
Once connected, verify the server:
hostname
uptime
cat /etc/os-release
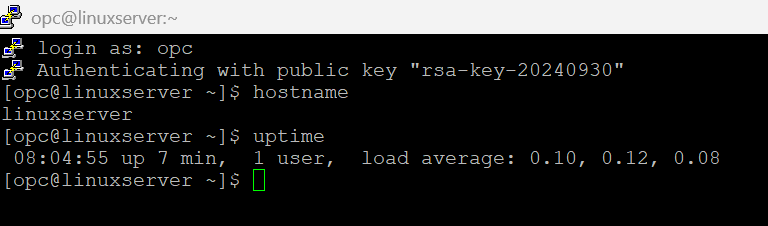
Screenshot shows an SSH login as opc. If the connection fails in your setup, check the public IP, Internet Gateway route, SSH ingress rules (TCP port 22 from your trusted source address), the server firewall rules, and the correct SSH key.
Conclusion
You have now followed the complete OCI Console workflow to launch an Oracle Linux 9 VM, select its compute resources, configure a primary VNIC, set up SSH authentication, provision the boot volume, and verify remote access.
References
About the author
- Cloud Evangelist passionate about Oracle Cloud Infrastructure (OCI), Oracle Database, and cloud technologies. Through this blog, I share technical knowledge, hands-on experiences, troubleshooting tips, and best practices from real-world implementations.